Don't fret - it might just need a good cleaning. In this ultimate guide to cleaning and maintaining your dryer, we will walk you through the steps to ensure optimal performance and longevity of your appliance.
The Ultimate Guide to Cleaning and Maintaining Your Dryer for Optimal Performance
Regular maintenance is key to keeping your dryer functioning at its best. From simple tasks like cleaning the lint filter after each use to more involved tasks like inspecting and cleaning the dryer vent, we will cover it all.
We will provide you with expert tips and tricks to remove lint buildup, prevent fire hazards, and improve the efficiency of your dryer.
By following our advice, you can enhance the performance of your dryer, reduce energy consumption, and extend its lifespan. So, whether you are a homeowner or a renter, this guide is a must-read to ensure your dryer remains in tip-top shape.
Don't let a dirty dryer slow you down – let's get started on maintaining a high-performing appliance!
Importance of Cleaning and Maintaining Your Dryer
Properly cleaning and maintaining your dryer is crucial for several reasons. First and foremost, regular maintenance ensures that your dryer operates at its peak performance.
Over time, lint and debris can accumulate in the dryer's filters, vents, and ducts, hindering airflow and reducing efficiency. By keeping these areas clean, you can prevent your dryer from working harder than necessary, ultimately saving energy and reducing your utility bills.
Moreover, a clean dryer is essential for fire safety. Lint is highly flammable, and when it builds up in the dryer's exhaust system, it can pose a serious fire hazard. In fact, according to the U.S. Fire Administration, failure to clean dryers is the leading cause of dryer fires. By regularly cleaning your dryer, you can significantly reduce the risk of a devastating fire in your home.
Lastly, maintaining your dryer can extend its lifespan. When lint and debris clog the dryer's components, it puts unnecessary strain on the machine, causing it to wear out faster. By keeping your dryer clean and well-maintained, you can ensure that it continues to operate efficiently for years to come, saving you money on costly repairs or replacements.
Now that we understand the importance of cleaning and maintaining our dryers, let's take a look at some signs that indicate your dryer needs cleaning.
Signs that Your Dryer Needs Cleaning
There are several signs that can indicate your dryer is in need of a thorough cleaning. Pay attention to the following warning signs and take action if you notice any of them:
- Longer Drying Times: If your clothes are taking longer than usual to dry, it could be a sign that your dryer's vents or ducts are clogged with lint. Restricted airflow prevents the hot air from circulating properly, resulting in extended drying times.
- Musty Smell: If your clothes come out of the dryer with a musty odor, it is likely that there is a buildup of moisture or mildew inside the machine. This can occur when the dryer's exhaust system is not properly venting the damp air.
- Excessive Heat: If your dryer feels excessively hot to the touch or if your laundry room becomes noticeably warmer when the dryer is running, it could be an indication that the vents or ducts are blocked. This restricts airflow and causes the heat to build up inside the machine.
- Visible Lint Buildup: Take a look inside your dryer and check for visible lint buildup. It is normal for some lint to accumulate, but if you notice an excessive amount, it is a clear sign that your dryer needs a thorough cleaning.
If you notice any of these signs, it is important to take immediate action to clean your dryer and prevent further issues. In the next section, we will discuss the tools and supplies you will need for dryer maintenance.

Tools and Supplies Needed for Dryer Maintenance
Before you start cleaning your dryer, gather the necessary tools and supplies to ensure a thorough and effective cleaning process. Here are the items you will need:
- Lint Brush or Vacuum Attachment: A lint brush or vacuum attachment specifically designed for dryer cleaning is essential for removing lint from the dryer's lint trap, filter, and other hard-to-reach areas.
- Screwdriver or Nut Driver: You may need a screwdriver or nut driver to remove the dryer's access panel, allowing you to access the lint trap and other components for cleaning.
- Vent Brush or Cleaning Kit: A vent brush or cleaning kit with flexible rods is necessary for cleaning the dryer vent and exhaust duct. These tools help to remove lint and debris that may have accumulated over time.
- All-Purpose Cleaner: To clean the dryer drum and exterior surfaces, you will need a mild all-purpose cleaner. Avoid using harsh chemicals or abrasive cleaners that can damage the finish of your dryer.
- Microfiber Cloth or Sponge: A microfiber cloth or sponge is ideal for wiping down the dryer's exterior surfaces and controls. These materials are gentle on the finish and help to remove any remaining dirt or grime.
Now that you have your tools and supplies ready, let's dive into the step-by-step process of cleaning and maintaining your dryer.

How to Clean the Lint Trap and Filter
Cleaning the lint trap and filter is a simple yet crucial step in maintaining your dryer's performance. The lint trap, also known as the lint screen, catches lint and debris as it is expelled from the dryer during the drying cycle. Over time, lint can accumulate on the screen, restricting airflow and reducing efficiency. Here's how to clean the lint trap and filter:
- Locate the Lint Trap: The lint trap is typically located inside the dryer drum, near the dryer door. It is a rectangular or square-shaped screen made of fine mesh.
- Remove the Lint Trap: Carefully pull out the lint trap from its housing. Depending on your dryer model, you may need to slide it out or lift it up to remove it.
- Remove the Lint: Use your fingers or a lint brush to remove the lint from the screen. Check both sides of the screen for any lint buildup and remove it thoroughly.
- Clean the Lint Trap Housing: While the lint trap is removed, take a moment to clean the lint trap housing. Use a lint brush or a vacuum attachment to remove any lint or debris that may have accumulated inside the housing.
- Wash the Lint Trap: If the lint trap is particularly dirty, you can clean it with a mild all-purpose cleaner. Gently scrub the screen with a soft brush or microfiber cloth to remove any stubborn debris.
- Dry and Reinstall the Lint Trap: After washing the lint trap, rinse it thoroughly with clean water and allow it to dry completely. Once dry, reinstall the lint trap back into its housing, ensuring it fits securely.
Cleaning the lint trap and filter should be done after each use of the dryer to maintain its efficiency. Additionally, it is essential to clean the dryer vent and exhaust duct to prevent lint buildup and improve airflow. Let's move on to the next section to learn how to clean these critical components.

Cleaning the Dryer Vent and Exhaust Duct
The dryer vent and exhaust duct play a crucial role in removing hot air and moisture from the dryer. Over time, lint can accumulate in these areas, obstructing airflow and increasing the risk of fire. Cleaning the dryer vent and exhaust duct is a more involved task, but it is essential for maintaining optimal performance and safety. Here's how to clean the dryer vent and exhaust duct:
- Disconnect the Dryer: Before cleaning the vent and exhaust duct, unplug the dryer from the power source. If your dryer is gas-powered, turn off the gas supply valve.
- Access the Vent and Exhaust Duct: Depending on your dryer's configuration, you may need to remove the dryer's back panel or access panel to gain access to the vent and exhaust duct. Consult your dryer's manual or manufacturer's instructions for guidance on accessing these components.
- Disconnect the Vent: Once you have access to the vent and exhaust duct, disconnect the vent from the dryer. This may involve loosening clamps or removing screws, depending on the type of connection.
- Clean the Vent and Duct: Use a vent brush or cleaning kit with flexible rods to clean the vent and exhaust duct thoroughly. Insert the brush or rod into the vent opening and push it through the duct, rotating it as you go to dislodge any lint or debris. Repeat this process several times to ensure a thorough cleaning.
- Remove Lint from the Vent Cover: While cleaning the vent and exhaust duct, take a moment to remove any lint or debris from the vent cover located on the exterior of your home. Use a brush or vacuum attachment to clear away any obstructions.
- Reconnect the Vent: After cleaning the vent and exhaust duct, reconnect the vent to the dryer. Ensure that it is securely fastened to prevent leaks or disconnections.
Cleaning the dryer vent and exhaust duct should be done at least once a year, or more frequently if you notice any signs of a clog. By keeping these areas clean, you can improve airflow and reduce the risk of fire. Let's move on to the next section to learn how to remove and clean the dryer drum.
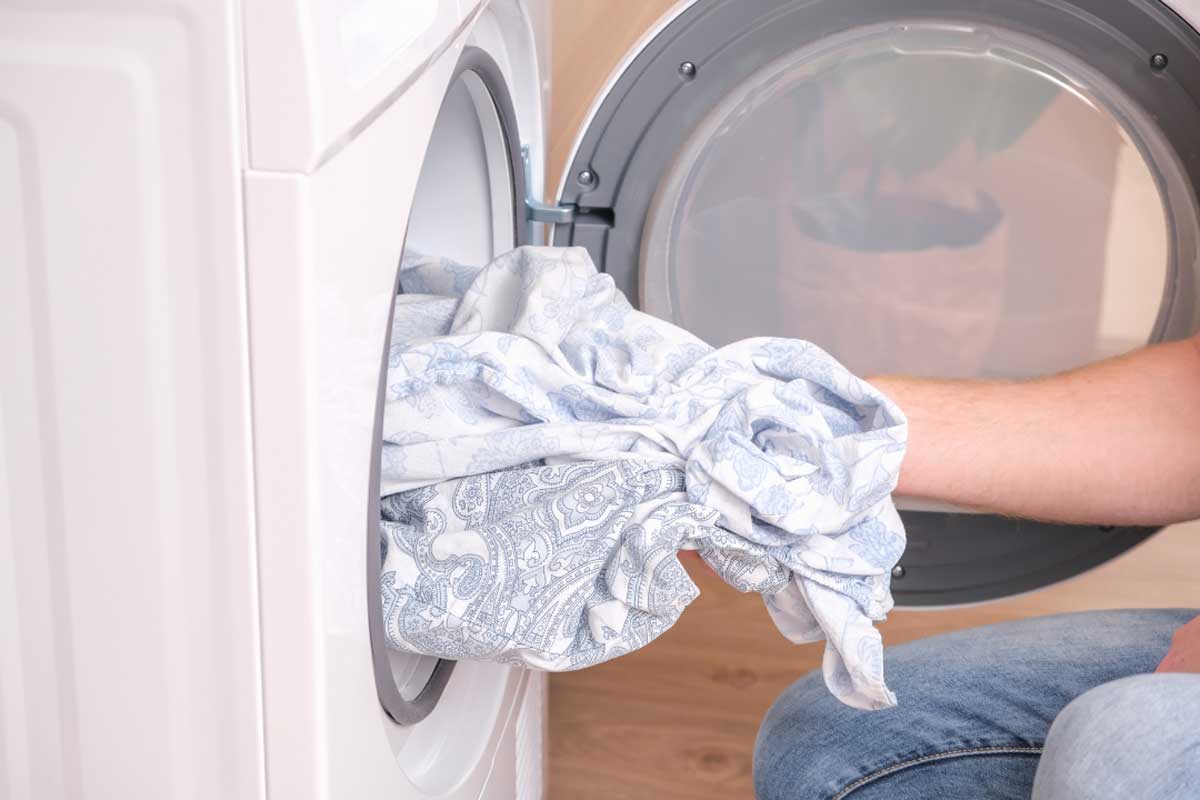
Removing and Cleaning the Dryer Drum
Cleaning the dryer drum is an often overlooked but important step in maintaining your dryer's performance and longevity. Over time, stains, residue, and fabric softener buildup can accumulate on the drum, affecting its efficiency and potentially transferring onto your clothes. Here's how to remove and clean the dryer drum:
- Unplug the Dryer: Before cleaning the drum, unplug the dryer from the power source to ensure your safety.
- Access the Arum: Depending on your dryer's design, you may need to remove the dryer's top panel, front panel, or both to access the drum. Consult your dryer's manual or manufacturer's instructions for guidance on removing these panels.
- Remove Any Debris: Use a lint brush or vacuum attachment to remove any loose lint, debris, or foreign objects from the drum. Pay close attention to the drum's edges and crevices.
- Clean the Drum: Use a mild all-purpose cleaner or a specialized dryer drum cleaner. Apply the cleaning solution to a microfiber cloth or sponge and wipe down the drum's interior surfaces. Ensure that you thoroughly clean the drum's walls, back, and the area around the drum's seal.
- Rinse and Dry the Drum: After cleaning, rinse the drum with clean water to remove any residue or cleaning solution. Once rinsed, use a clean towel or cloth to dry the drum completely.
- Reassemble the Dryer: After the drum is dry, reassemble the dryer by replacing the removed panels. Ensure that all panels are securely fastened before plugging the dryer back into the power source.
Cleaning the dryer drum should be done periodically to prevent stains and buildup that can affect the efficiency of your dryer and the freshness of your clothes. In the next section, we will discuss how to maintain the dryer's exterior and controls.
Maintaining the Dryer's Exterior and Controls
While cleaning the internal components of your dryer is essential for optimal performance, it is equally important to maintain the dryer's exterior and controls. Regularly cleaning and inspecting these areas can help prevent dirt, dust, and grime from accumulating, ensuring that your dryer remains in excellent condition. Here's how to maintain the dryer's exterior and controls:
- Wipe Down the Exterior Surfaces: Use a microfiber cloth or sponge dampened with a mild all-purpose cleaner to wipe down the dryer's exterior surfaces. Pay attention to the top, sides, front, and back of the dryer, removing any visible dirt or stains.
- Clean the Control Panel: Gently wipe the control panel with a slightly damp cloth to remove any dust or residue. Avoid using excessive water or cleaning solutions that can damage the controls.
- Inspect the Power Cord: Regularly inspect the dryer's power cord for any signs of damage, such as frayed wires or exposed insulation. If you notice any issues, replace the cord immediately to prevent electrical hazards.
- Check the Leveling and Stability: Ensure that your dryer is level and stable. If the dryer is not sitting level on the floor, it can cause excessive vibrations and noise during operation. Adjust the leveling feet as necessary to achieve a stable and balanced position.
- Clean the Dryer's Exhaust Vent: Periodically check the dryer's exhaust vent on the exterior of your home. Remove any lint or debris that may have accumulated, as this can obstruct airflow and reduce dryer performance.
By regularly maintaining the dryer's exterior and controls, you can keep your appliance looking and functioning at its best. However, there are additional steps you can take to prevent future dryer issues. Let's explore some helpful tips in the next section.

Tips for Preventing Future Dryer Issues
In addition to regular cleaning and maintenance, there are several tips you can follow to prevent future dryer issues and ensure optimal performance. By incorporating these practices into your laundry routine, you can prolong the lifespan of your dryer and avoid costly repairs. Here are some helpful tips:
- Clean the Lint Trap After Each Use: Make it a habit to clean the lint trap after every drying cycle. This prevents lint from accumulating and obstructing airflow, improving drying efficiency and reducing the risk of fire.
- Inspect and Clean the Vent Regularly: Schedule regular inspections of the dryer's vent and exhaust duct, and clean them as needed. This helps to prevent lint buildup and ensures proper airflow, reducing drying times and energy consumption.
- Avoid Overloading the Dryer: Overloading the dryer can strain the machine and hinder proper airflow. Follow the manufacturer's guidelines for load capacity to ensure efficient drying and prevent unnecessary wear and tear.
- Use Dryer Balls Instead of Fabric Softener: Consider using dryer balls instead of fabric softener sheets. Dryer balls help to fluff and separate clothes, reducing drying time and eliminating the need for chemical-laden fabric softeners.
- Clean and Dry Items Before Putting Them in the Dryer: Ensure that items are clean and dry before placing them in the dryer. Wet or damp items can increase drying times and potentially transfer stains or odors onto other clothes.
- Keep the Dryer Area Clean and Clutter-Free: Keep the area around your dryer clean and free from clutter. Avoid storing flammable items near the dryer,
Enjoying a Clean and Efficient Dryer
A well-maintained dryer not only ensures your clothes dry quickly and efficiently but also prevents potential issues down the line. Here are some tips to help you prevent future dryer problems:
1. Clean the Lint Filter After Each Use.
One of the easiest and most important maintenance tasks for your dryer is cleaning the lint filter. The lint filter collects lint and debris that can accumulate during the drying process. A clogged lint filter can restrict airflow, leading to longer drying times and increased energy consumption. To clean the lint filter, simply remove it from the dryer and gently brush off any lint. For a deeper clean, you can wash the filter with warm, soapy water and allow it to dry completely before reinserting it into the dryer.
2. Inspect and Clean the Dryer Vent.
The dryer vent is responsible for removing hot air and moisture from the dryer. Over time, lint and debris can accumulate in the vent, causing blockages and reducing airflow. This not only affects the drying performance but also poses a fire hazard. Regularly inspect the dryer vent for any signs of obstruction or damage. If you notice any blockages or a significant buildup of lint, it's time to clean the vent. You can use a vent brush or a vacuum cleaner with a long attachment to remove the lint. Additionally, ensure that the vent hose is properly connected and free of any kinks or bends.
3. Avoid Overloading the Dryer.
While it may be tempting to stuff as many clothes as possible into the dryer to save time, overloading can actually hinder its performance. Overloading prevents proper airflow and can lead to uneven drying. It also puts extra strain on the motor and other components, potentially causing them to wear out faster. To ensure optimal drying results, only fill the dryer to about three-quarters of its capacity. This allows the air to circulate freely, leading to faster and more efficient drying.
4. Use the Appropriate Drying Settings.
Different fabrics require different drying settings to prevent damage and ensure optimal results. Always check the care labels on your clothes and follow the recommended drying instructions. Using the appropriate heat setting and cycle length will not only protect your garments but also help conserve energy. For delicate items, consider using a low-heat or air-dry setting. Avoid using high heat for items that may shrink, fade, or get damaged.
5. Keep the Dryer Exterior Clean.
While it's essential to clean the internal components of your dryer, don't forget about the external surfaces. Dust and debris can accumulate on the exterior, potentially affecting the airflow and overall performance. Regularly wipe down the dryer with a damp cloth or mild cleaning solution to keep it looking and functioning its best.
By following these preventative maintenance tips, you can keep your dryer running smoothly and avoid costly repairs in the future. Now, let's take a look at some common dryer maintenance mistakes to avoid.
1 comment
Great information! The best I have seen. I am a Fire Chief and sadly have seen the consequences of people not knowing and following this information. Thank you.